Using Crello for Work: Get Organized and Save Time Creating Content
Bloggers, social media marketers and even entrepreneurs know how valuable time is, and how much (proportionally) of it goes to creating new content. In light of the everyday struggles, Crello can help you both get organized and save time when creating graphics for website, social media and blogs.
There’s two simple options we’ll discuss today – how to organize your designs in folders and how to create visual content for multiple social media platforms. Did we hit the nail on the head with these two? Many struggle with both organization and efficiency so why not try a new workflow?
Using Crello for work
Crello is a complete solution for designing visuals without prior design skills. If you’re not a Photoshop wizz, you probably leave the tasks to designers. With budget constraints, you’ve probably stumbled on a few online graphics editors. Crello helps you create images for blogs, websites, social media and print materials with a few clicks and adjustments.
If you’re in constant need of visuals, creating graphics is simplified with this tool. If you have a designer on your team, that’s great but what if you don’t? You may have been ignoring the power of visuals in marketing up until now. With Crello, you simply choose a template for a format you need, and edit it for your project. Crello lets you take matters into your own hands, and here’s how you can use it for work. Now that you’ve found a better mousetrap, time to pay attention to visuals!

How to use Crello’s folders
We always strive to be more organized, but yet again, under time constraints, our desktops begin to look like a DIY pattern of folders, images and files. Mind you, half of them likely belong in the trash. As you’re starting to use Crello, the “My Projects” tab might take on the same function – a dumping ground for all your designs.
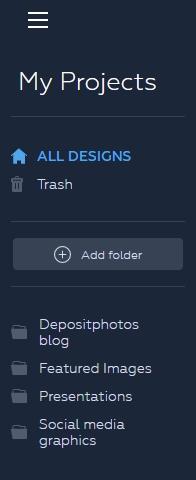
An easy solution is to create folders where you can organize your designs depending on your project. If you look on the left of your artboard, you will see the option “Add folder”. Simply click on it, give your folder a name, and continue doing this until you’ve categorized all your activities on Crello.
Next, drag and drop your designs from “My Projects” to the folders they belong in. You can organize folders in any way that’s more convenient for you – topics, dates, or even deadlines. This way, you’ll have an easier time looking for specific designs and be able to keep all your work related items in one place where you can always find them.

How to create designs for multiple platforms in a click
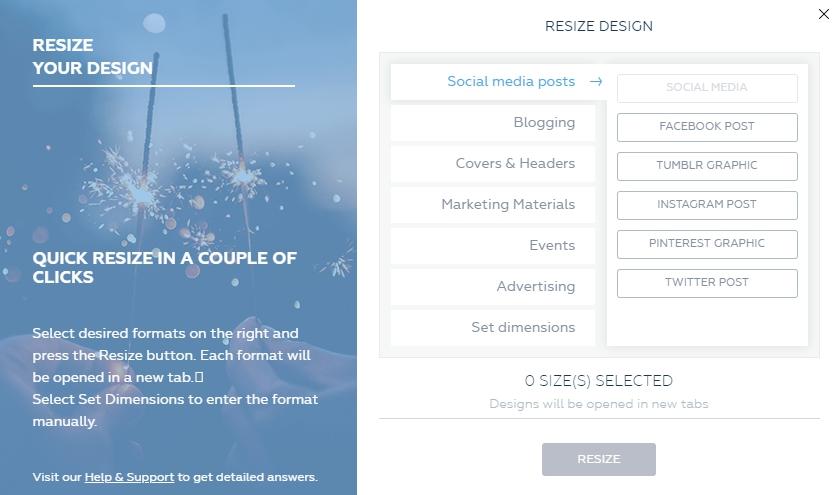
Resize – a feature that will become a true lifesaver. If social media activity is part of your work, modifying designs for each platform from choosing different templates, to trying to keep to the same style is tedious work. The resize feature allows you to create multiple designs from your original one, adopting them for different platform in a few clicks.
First you need to create your design. You will see the “Resize” button at the top right corner of your artboard. Once you click on it, you can select the other formats you need to modify this design to fit. Click “Resize” in the pop up window and your new designs will open in new tabs. You will need to do some basic adjustments to the new designs to make them fit their format, but you’ve just saved yourself hours of meticulous work!

Bonus timesaver – Inspirational Collection
While we’re on the topic of being short on time, it’s really hard to generate new ideas for all of your marketing plans. Crello’s Inspirational Collection is an assortment of different formats and templates fit for upcoming events and important dates.
Aside from the Inspirational Collection, you can always look through Crello’s thematic templates, which are organized by topics, and draw ideas for your projects. With time, you’ll be able to create your own designs in Crello from scratch, but for now know that you have reliable resource to turn to for more design ideas.

As a last piece of advice, let Crello be a reminder that all content can come with a professional visual to make it more impactful. If you have business updates, news or other important announcements – make them visual. You can use the tools and features we discussed to make people more likely to interact and remember your content.


